Xiangli Yao Build Guide, Skills, Combos & Teams Wuthering Waves
Basic Information


Xiangli Yao
Principal Investigator at Huaxu Academy's Jinzhou Campus, and the Academy's youngest multi-disciplinary scientist.
A gentle soul with a sharp mind, whose relentless passion for Automata Mechanics always translates into constructive findings and insights.
Resonator's Stats
Resonator's stats per level
| Stat | Lv 1 | Lv 20 | Lv 40 | Lv 50 | Lv 60 | Lv 70 | Lv 80 | Lv 90 |
|---|---|---|---|---|---|---|---|---|
| | 850 | 2777.55 | 4776.83 | 6059.82 | 7342.73 | 8625.72 | 9908.7 | 10625 |
| | 34 | 113.94 | 196.74 | 250.89 | 305.04 | 350.7 | 396.35 | 425 |
| | 100 | 321.36 | 550.97 | 698.18 | 845.4 | 992.61 | 1139.82 | 1222.22 |
Resonator's Graduation Stats
15000+
1900 - 2500+
1200+
100% - 130%+ (Optional depending on playstyle and team composition)
In Xiangli Yao's most common teams, he doesn't specifically require any energy regeneration in order to gain access to his ultimate in a timely manner or perform his rotation. With that said if you want to be safe and ensure you always have it on hand acquiring 25% - 30% energy regeneration on gear should smooth things out especially when your team's rotations don't go quite as planned.
60% - 85%+
270% - 320%+
30% - 70%+
Level Upgrade Materials
| Lv 20 | Lv 40 | Lv 50 | Lv 60 | Lv 70 | Lv 80 |
|---|---|---|---|---|---|
| |
Skills & Resonance Chains
Skills
Basic Attack
- Perform up to 5 consecutive attacks, dealing Electro DMG.
Heavy Attack
- Perform a charged attack at the cost of STA, dealing Electro DMG.
Mid-air Attack
- Perform a Plunging Attack from mid-air at the cost of STA, dealing Electro DMG.
Dodge Counter
- Use Basic Attack after a successful Dodge to attack the target, dealing Electro DMG.
| Stat | Lv 1 | Lv 2 | Lv 3 | Lv 4 | Lv 5 | Lv 6 | Lv 7 | Lv 8 | Lv 9 | Lv 10 |
|---|---|---|---|---|---|---|---|---|---|---|
| Stage 1 DMG | 16.65%*2 | 18.02%*2 | 19.39%*2 | 21.30%*2 | 22.66%*2 | 24.23%*2 | 26.42%*2 | 28.60%*2 | 30.79%*2 | 33.11%*2 |
| Stage 2 DMG | 50.10% | 54.21% | 58.32% | 64.07% | 68.18% | 72.91% | 79.48% | 86.05% | 92.62% | 99.61% |
| Stage 3 DMG | 20.00%*3 | 21.64%*3 | 23.28%*3 | 25.58%*3 | 27.22%*3 | 29.10%*3 | 31.73%*3 | 34.35%*3 | 36.98%*3 | 39.76%*3 |
| Stage 4 DMG | 26.68%*2+13.34% | 28.87%*2+14.44% | 31.06%*2+15.53% | 34.12%*2+17.06% | 36.31%*2+18.16% | 38.83%*2+19.42% | 42.33%*2+21.17% | 45.83%*2+22.92% | 49.33%*2+24.67% | 53.05%*2+26.53% |
| Stage 5 DMG | 100.00% | 108.20% | 116.40% | 127.88% | 136.08% | 145.51% | 158.63% | 171.75% | 184.87% | 198.81% |
| HA DMG | 41.65%*2 | 45.07%*2 | 48.49%*2 | 53.27%*2 | 56.68%*2 | 60.61%*2 | 66.07%*2 | 71.54%*2 | 77.00%*2 | 82.81%*2 |
| Mid-air Attack DMG | 62.00% | 67.09% | 72.17% | 79.29% | 84.37% | 90.22% | 98.36% | 106.49% | 114.62% | 123.27% |
| Dodge Counter DMG | 120.00% | 129.84% | 139.68% | 153.46% | 163.30% | 174.62% | 190.36% | 206.10% | 221.85% | 238.58% |
| HA STA Cost | 25 | 25 | 25 | 25 | 25 | 25 | 25 | 25 | 25 | 25 |
| Mid-air Attack STA Cost | 30 | 30 | 30 | 30 | 30 | 30 | 30 | 30 | 30 | 30 |
- Attack the target, dealing Electro DMG.
| Stat | Lv 1 | Lv 2 | Lv 3 | Lv 4 | Lv 5 | Lv 6 | Lv 7 | Lv 8 | Lv 9 | Lv 10 |
|---|---|---|---|---|---|---|---|---|---|---|
| Skill DMG | 100.00% | 108.20% | 116.40% | 127.88% | 136.08% | 145.51% | 158.63% | 171.75% | 184.87% | 198.81% |
| Cooldown | 5 | 5 | 5 | 5 | 5 | 5 | 5 | 5 | 5 | 5 |
| Concerto Regen | 7 | 7 | 7 | 7 | 7 | 7 | 7 | 7 | 7 | 7 |
Resonance Skill - Decipher
- When Capacity reaches 100, Resonance Skill Deduction is replaced by Resonance Skill Decipher.
- Consume 100 Capacity to cast Resonance Skill Decipher, dealing Electro DMG, considered as Resonance Liberation DMG.
Resonance Skill - Law of Reigns
- When Performance Capacity reaches 5 in Intuition state, Resonance Skill Divergence is replaced by Resonance Skill Law of Reigns.
- Consume 5 Performance Capacity to cast Resonance Skill Law of Reigns, dealing Electro DMG, considered as Resonance Liberation DMG.
Mid-air Attack - Revamp
- Shortly after casting Resonance Skill Decipher or Resonance Skill Divergence, use Basic Attack to perform Mid-air Attack Revamp at the cost of STA, dealing Electro DMG, considered as Resonance Liberation DMG.
Capacity
- Xiangli Yao can hold up to 100 Capacity.
- Every Normal Attack Probe on hit grants Capacity.
- Every Resonance Skill Deduction on hit grants Capacity.
Performance Capacity
- Xiangli Yao can hold up to 5 Performance Capacity.
- When in Intuition triggered by Resonance Liberation:
- Obtain 1 Performance Capacity when Stage 1 of Basic Attack Pivot - Impale hits a target.
- Obtain 2 Performance Capacity when Stage 2 or 3 of Basic Attack Pivot - Impale hits a target.
- Obtain 2 Performance Capacity for every Resonance Skill Divergence on hit.
- Obtain 3 Performance Capacity for every Mid-air Attack Revamp on hit.
- Obtain 2 Performance Capacity for every Dodge Counter Unfathomed on hit.
| Stat | Lv 1 | Lv 2 | Lv 3 | Lv 4 | Lv 5 | Lv 6 | Lv 7 | Lv 8 | Lv 9 | Lv 10 |
|---|---|---|---|---|---|---|---|---|---|---|
| Decipher DMG | 200.10% | 216.51% | 232.92% | 255.89% | 272.30% | 291.17% | 317.42% | 343.68% | 369.93% | 397.82% |
| Law of Reigns DMG | 48.15%*4+128.40% | 52.10%*4+138.93% | 56.05%*4+149.46% | 61.58%*4+164.20% | 65.53%*4+174.73% | 70.07%*4+186.84% | 76.39%*4+203.69% | 82.70%*4+220.53% | 89.02%*4+237.38% | 95.73%*4+255.28% |
| Revamp DMG | 11.00%*4+33.00%*2 | 11.91%*4+35.71%*2 | 12.81%*4+38.42%*2 | 14.07%*4+42.21%*2 | 14.97%*4+44.91%*2 | 16.01%*4+48.02%*2 | 17.45%*4+52.35%*2 | 18.90%*4+56.68%*2 | 20.34%*4+61.01%*2 | 21.87%*4+65.61%*2 |
| Revamp STA Cost | 30 | 30 | 30 | 30 | 30 | 30 | 30 | 30 | 30 | 30 |
| Decipher Concerto Regen | 7 | 7 | 7 | 7 | 7 | 7 | 7 | 7 | 7 | 7 |
| Law of Reigns Concerto Regen | 10 | 10 | 10 | 10 | 10 | 10 | 10 | 10 | 10 | 10 |
| Revamp Concerto Regen | 5 | 5 | 5 | 5 | 5 | 5 | 5 | 5 | 5 | 5 |
- Attack the target, dealing Electro DMG. Enter Intuition.
- When in Intuition:
- Obtain 3 Hypercube(s). Each time Resonance Skill Law of Reigns is cast, consume 1 Hypercube(s). Intuition ends once all Hypercubes are consumed.
- Basic Attack and Heavy Attack are replaced with Basic Attack Pivot - Impale, which performs up to 3 consecutive attacks, dealing Electro DMG.
- Resonance Skill Deduction is replaced with Resonance Skill Divergence, which deals Electro DMG.
- Dodge Counter is replaced with Dodge Counter Unfathomed, considered as Resonance Liberation DMG.
| Stat | Lv 1 | Lv 2 | Lv 3 | Lv 4 | Lv 5 | Lv 6 | Lv 7 | Lv 8 | Lv 9 | Lv 10 |
|---|---|---|---|---|---|---|---|---|---|---|
| Cogitation Model DMG | 737.42% | 797.89% | 858.35% | 943.01% | 1003.48% | 1073.02% | 1169.76% | 1266.51% | 1363.26% | 1466.06% |
| Pivot - Impale Stage 1 DMG | 60.19% | 65.13% | 70.06% | 76.97% | 81.91% | 87.59% | 95.48% | 103.38% | 111.28% | 119.67% |
| Pivot - Impale Stage 2 DMG | 30.65%*4 | 33.16%*4 | 35.67%*4 | 39.19%*4 | 41.70%*4 | 44.59%*4 | 48.61%*4 | 52.63%*4 | 56.65%*4 | 60.92%*4 |
| Pivot - Impale Stage 3 DMG | 67.03%*2 | 72.52%*2 | 78.02%*2 | 85.71%*2 | 91.21%*2 | 97.53%*2 | 106.32%*2 | 115.12%*2 | 123.91%*2 | 133.25%*2 |
| Divergence DMG | 24.94%*3+87.29%*2 | 26.99%*3+94.45%*2 | 29.04%*3+101.61%*2 | 31.90%*3+111.63%*2 | 33.94%*3+118.79%*2 | 36.30%*3+127.02%*2 | 39.57%*3+138.47%*2 | 42.84%*3+149.93%*2 | 46.11%*3+161.38%*2 | 49.59%*3+173.55%*2 |
| Unfathomed DMG | 19.53%*2+156.22% | 21.13%*2+169.03% | 22.73%*2+181.84% | 24.98%*2+199.77% | 26.58%*2+212.58% | 28.42%*2+227.31% | 30.98%*2+247.81% | 33.54%*2+268.30% | 36.10%*2+288.80% | 38.83%*2+310.58% |
| Intuition Duration | 24 | 24 | 24 | 24 | 24 | 24 | 24 | 24 | 24 | 24 |
| Cogitation Model Cooldown | 25 | 25 | 25 | 25 | 25 | 25 | 25 | 25 | 25 | 25 |
| Divergence Cooldown | 7 | 7 | 7 | 7 | 7 | 7 | 7 | 7 | 7 | 7 |
| Resonance Cost | 125 | 125 | 125 | 125 | 125 | 125 | 125 | 125 | 125 | 125 |
| Cogitation Model Concerto Regen | 20 | 20 | 20 | 20 | 20 | 20 | 20 | 20 | 20 | 20 |
| Divergence Concerto Regen | 10 | 10 | 10 | 10 | 10 | 10 | 10 | 10 | 10 | 10 |
- Attack the target, dealing Electro DMG.
| Stat | Lv 1 | Lv 2 | Lv 3 | Lv 4 | Lv 5 | Lv 6 | Lv 7 | Lv 8 | Lv 9 | Lv 10 |
|---|---|---|---|---|---|---|---|---|---|---|
| Skill DMG | 50.00%*2 | 54.10%*2 | 58.20%*2 | 63.94%*2 | 68.04%*2 | 72.76%*2 | 79.32%*2 | 85.88%*2 | 92.44%*2 | 99.41%*2 |
| Concerto Regen | 10 | 10 | 10 | 10 | 10 | 10 | 10 | 10 | 10 | 10 |
- Xiangli Yao will call down a laser beam upon the first target the incoming Resonator's Basic Attack hits, dealing Electro DMG equal to 237.63% of Xiangli Yao's ATK to an area. This effect lasts for 8s and can be triggered once every 2s, up to 3 times.
Skill Upgrade Materials
| Lv 2 | Lv 3 | Lv 4 | Lv 5 | Lv 6 | Lv 7 | Lv 8 | Lv 9 | Lv 10 |
|---|---|---|---|---|---|---|---|---|
Resonance Chain
- Resonance Skill Law of Reigns additionally launches 6 Convolution Matrices at enemies, each dealing Resonance Liberation DMG equal to 8% of the skill's DMG Multiplier.
- Casting Resonance Skill or Resonance Liberation Cogitation Model increases Crit. DMG by 30% for 8s.
- Casting Resonance Liberation Cogitation Model increases the DMG of the following Resonance Skill moves by 63% for 24s: Decipher, Deduction, Divergence, and Law of Reigns.
- This effect can be triggered up to 5 times.
- Casting Resonance Liberation Cogitation Model grants a 25% DMG Bonus to all team members' Resonance Liberation for 30s.
- The DMG Multiplier of Outro Skill Chain Rule is increased by 222%. The DMG Multiplier of Resonance Liberation Cogitation Model is increased by 100%.
- The Hypercubes obtained from Resonance Liberation Cogitation Model are enhanced, increasing the DMG Multiplier of Resonance Skill Law of Reigns by 76%.
Skill Priority
Weapons
Xiangli Yao's signature and an ideal weapon for any Resonance Liberation based Gauntlet user. Grants a tremendous 24.3% CRIT RATE boost and 12% generic DMG% boost all permanently and on top of that also grants an incredibly convenient 48% Resonance Liberation DMG% lasting 8 seconds on use of the wearers Liberation. Due to the timing of when this buff activates, it is almost always up when you need it most and the duration can also be extended up to 3 times for 5 seconds each time whenever you use a resonance skill. This extends the total duration of this buff to a whopping 23 seconds.
One of the top Gauntlets options in game with the only competitors being 4★ Weapons with multiple dupes. Offers high base ATK, ATK%, a good amount of Energy Regen to save at least 1 sub-stat on gear to be reallocated to better uses and a conditional bonus boosting Resonance Skill damage and Basic Attacks that is very easy to satisfy.
Specialist Gauntlets for Resonance Liberation scaling users, thanks to its passive that grants increased Resonance Liberation DMG% after using a Resonance Skill. Still usable by characters who don't focus specifically on Liberation damage as a big part of their kit, thanks to the reasonably high base stats but more importantly CRIT RATE main stat.
Most often the best F2P 4* gauntlet option for DPS characters scaling off of ATK. The ATK% boost it provides when casting your Resonance Skill is great on most characters, and while the small energy generation it provides at the same time is more situational, it can be handy as well.
Strong generic option for all Gauntlets users, offering an ATK% and DEF% after using Resonance Liberation in the form of 3 charges. Since most characters include their Liberation in their rotation in the endgame you can expect this bonus to be applied quickly and consistently. Unfortunately, whenever you are hit you'll lose 1 charge so to use this weapon effectively, you must minimize how many times you're hit. Calculations assume you can maintain your rotation without getting hit - if you think you will be lower your expectations of this weapon and it's position in the ranking.
Echo set
Echo set 1
5pcs Set: Electro DMG + 15% after releasing Heavy Attack or Resonance Skill. This effect stacks up to 2 times, each stack lasts 15s.
Void Thunder increases Electro DMG Bonus which is amazing for a main DPS like Xiangli Yao. The 5-pc effect also helps Xiangli Yao deal more damage after using his Resonance Skill or even his Heavy ATK.
Transform into Nightmare: Thundering Mephis and attack enemies in front, dealing 405.00% Electro DMG.
The Resonator with this Echo equipped in their main slot gains 12.00% Electro DMG Bonus and 12.00% Resonance Liberation DMG Bonus.
CD: 25s.
Increases Electro DMG and Resonance Liberation DMG. No need to use Echo Skill to receive DMG buffs. If you do not have a Nightmare: Thundering Mephis, it can be replaced by either Tempest Mephis or Thundering Mephis.
Echo set 2
5pcs Set: While on the field, ATK increases by 5% every 1.5s. This effect stacks up to 4 times. Outro Skill DMG + 60%.
This set almost almost loses out to most characters signature elemental sets, but is generically usable across all damage characters regardless of their element.
Strike enemies in front, dealing 48.64% Electro DMG, and summon Mech Waste to attack. Mech Waste deals 320.00% Electro DMG on hit and explodes after a while, dealing 160.00% Electro DMG.
After casting this Echo Skill, increase the current character's ATK by 12.00% for 15s.
Damage dealt by Mech Waste equals to the Resonator's Outro Skill DMG.
CD: 20s
Very easy echo to use that should be used at the very beginning of the burst window right after the Intro. Thanks to its instant cast there is no thinking required and you can enjoy your ATK% boost and some nice burst damage.
Echo stat
Synergies & Team Formation
Synergies
Easily Xiangli Yao's best easy to use partner, as she provides great off-field DMG via Coordinated Attacks, and amazing 20% Electro and 25% Liberation DMG Amplify Outro buffs. The pair is natural.
Let's be clear: we don't recommend Changli+Xiangli Yao to casual players. The pair is extremely quickswap heavy and reliant on that mechanic to deal any semblance of good damage. It will underperform drastically if you don't quickswap a ton of attacks from both characters, especially compared to Yinlin. However, if you really want to push this game's limits, this duo is one of the highest damaging in the entire game. Good luck.
Good option for Xiangli Yao if you don't own Yinlin, as she amplifies Liberation DMG by 38% on Outro, which is a significant boost to his damage. However, Jianxin is awkward to use due to her extended field time and Energy problems. Only use her if you don't own Yinlin and aren't willing to quickswap.
Xiangli Yao's best option that isn't a limited 5 star if you are willing to quickswap. Xiangli Yao has several windows Yangyang can use to get a lot of attacks in and effectively allow you to play two characters at once, making for a great damaging pair. No Energy problems to worry about as well, thanks to Yangyang's Outro.
One of the usual Healing Support options that can slot into any team. Super easy to use, provides amazing team-wide ATK% buffs and 15% DMG Amplify with one of the fastest rotations in the game.
Similar to Verina, a premium Healing Support option who can not only slot into any team, but also provide insane 12.5% Crit Rate, 25% Crit DMG, 25% ATK and 15% DMG Amplify buffs to your whole team. One of the best but also easy to use characters in the game.
Team Formation
Best Team
Youhu CAN be used here to buff Yinlin's Coordinated Attack DMG, but it's not optimal.
Expert Team
VERY difficult to play. Not recommended to casual players.
Budget Team
Might face Energy problems and need more Energy Regen to be built on Xiangli Yao.
Budget Expert Team
Not recommended to casual players, benefits strongly from Swap Cancels.
More Info
Cherished Items
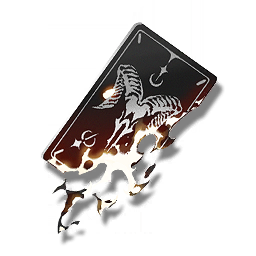
 Xiangli Yao's ID Card
 Xiangli Yao's work ID card reads "Xiangli Yao, Researcher, Huaxu Academy," neatly printed.
It took Xiangli Yao an extra year to wear this simple, plain card with a built-in ID chip on his chest compared to his peers at the Academy—a year ago, he had chosen not to take the Academy exam, instead leaving Jinzhou in search of answers to life's deeper questions. A teenager at the time, he stood at a crossroads, uncertain whether to follow in his parents' footsteps or forge his own path. However, a year later, his heart led him down a path entirely different from theirs...
On his first day as a researcher, Xiangli Yao placed his ID card neatly on his desk, opened the window, and let the bustling sounds of Jinzhou City drift in.
"Huaxu Academy. It's a nice place."
 Beep-Boop
 This charming little robot, with its slightly yellowed surface, is both simple and compact. Give its tiny head a pat, and it will recite one of the classic Hero Play lines, accompanied by adorable pixel emojis displayed on its somewhat aged monitor. This was Xiangli Yao's first creation during his student days and served as the prototype for his later inventions, Xiang-Lee and Patty. Despite being Yao's initial attempt, the robot's design, materials, and programming beautifully showcase its creator's ingenuity.
Affectionately named Beep-Boop, this lovable machine eventually found a home with one of Yao's lucky classmates. From that point on, Xiangli Yao devoted much of his free time to crafting models, robots, and other fascinating gadgets for his friends.
Whether in school or now at the Academy, Yao's generosity in dedicating time and effort to those around him remains a constant. His selfless nature has always been, and continues to be, an integral part of who he is.
 CSC Lock Puzzle
 A puzzle crafted from intricately interlocking joints, a testament to its ingenious design. It is said that such trinkets served as gifts from elder members of the Court of Savantae to their younger generations.
Xiangli Yao can still recall the warmth of his father's rough fingertips as he handed him the puzzle on his birthday. Yet what truly captivated him were its complex arrangements and perplexing structures—such puzzles were what drew him into a world of intricate logic, leaving him spellbound for years to come.
This was Xiangli Yao's first encounter with a puzzle, but certainly not his last.









All Comments 0