Rover: Havoc
Basic Information


Rover: Havoc
A mysterious Resonator with the power to absorb all sounds. Currently journeying to find their lost memories.

Resonator's Stats
Resonator's stats per level
| Stat | Lv 1 | Lv 20 | Lv 40 | Lv 50 | Lv 60 | Lv 70 | Lv 80 | Lv 90 |
|---|---|---|---|---|---|---|---|---|
| | 866 | 2829.83 | 4866.75 | 6173.89 | 7480.94 | 8788.08 | 10095.22 | 10825 |
| | 33 | 110.59 | 190.95 | 243.51 | 296.07 | 340.38 | 384.69 | 412.5 |
| | 103 | 331 | 567.5 | 719.13 | 870.76 | 1022.39 | 1174.01 | 1258.89 |
Resonator's Graduation Stats
15000+
1900-2300+
1200+
100% - 120%
- How much energy regeneration you'll want on your S2+ Havoc Rover will depend on how you intend to play them. The longer you keep Rover on the field during their Umbra State, basic attacking the less energy regeneration you'll need.
- If you intend to play Havoc Rover as a Hyper Carry or have them on-field during Umbra for 2 or more full basic attack sequences you can get away with 0 - 10% Energy regeneration and have access to your ultimate during each Umbra burst window when played correctly.
- If you plan to play Havoc Rover as a Quick Swap damage dealer completing 1 or 0 full basic attack sequences during Umbra we recommend 10 - 20% Energy Regeneration.
- It should be noted in all playstyles of Havoc Rover energy regeneration is never undesirable as their Ultimate has a fairly short cooldown and is always an excellent on-demand nuke so gaining access to it faster is never a bad thing - just a lesser priority than damage-focused stats.
50% - 75%+
250% - 300%+
52% - 82%+
Level Upgrade Materials
| Lv 20 | Lv 40 | Lv 50 | Lv 60 | Lv 70 | Lv 80 |
|---|---|---|---|---|---|
| |


Skills & Resonance Chains
Skills
Basic Attack
Rover-Havoc performs up to 5 consecutive attacks, dealing Havoc DMG.
Heavy Attack
Rover-Havoc consumes STA to attack, dealing Havoc DMG.
Use Basic Attack after casting Heavy Attack to cast Basic Attack 4.
Mid-air Attack
Rover-Havoc consumes STA to cast a Mid-Air Plunging Attack, dealing Havoc DMG.
Dodge Counter
Use Basic Attack after a successful Dodge to attack the target, dealing Havoc DMG.
| Stat | Lv 1 | Lv 2 | Lv 3 | Lv 4 | Lv 5 | Lv 6 | Lv 7 | Lv 8 | Lv 9 | Lv 10 |
|---|---|---|---|---|---|---|---|---|---|---|
| Stage 1 DMG | 28.50% | 30.84% | 33.18% | 36.45% | 38.79% | 41.48% | 45.21% | 48.95% | 52.69% | 56.67% |
| Stage 2 DMG | 28.50%*2 | 30.84%*2 | 33.18%*2 | 36.45%*2 | 38.79%*2 | 41.48%*2 | 45.21%*2 | 48.95%*2 | 52.69%*2 | 56.67%*2 |
| Stage 3 DMG | 42.75% | 46.26% | 49.77% | 54.67% | 58.18% | 62.21% | 67.82% | 73.43% | 79.04% | 85.00% |
| Stage 4 DMG | 20.27%*3 | 21.93%*3 | 23.60%*3 | 25.92%*3 | 27.58%*3 | 29.50%*3 | 32.15%*3 | 34.81%*3 | 37.47%*3 | 40.30%*3 |
| Stage 5 DMG | 47.50%*2 | 51.40%*2 | 55.29%*2 | 60.75%*2 | 64.64%*2 | 69.12%*2 | 75.35%*2 | 81.59%*2 | 87.82%*2 | 94.44%*2 |
| Heavy Attack DMG | 48.00% | 51.94% | 55.88% | 61.39% | 65.32% | 69.85% | 76.15% | 82.44% | 88.74% | 95.43% |
| Mid-air Attack DMG | 58.90% | 63.73% | 68.56% | 75.33% | 80.16% | 85.71% | 93.44% | 101.17% | 108.89% | 117.10% |
| Dodge Counter DMG | 90.25% | 97.66% | 105.06% | 115.42% | 122.82% | 131.33% | 143.17% | 155.01% | 166.85% | 179.43% |
| Heavy Attack STA Cost | 25 | 25 | 25 | 25 | 25 | 25 | 25 | 25 | 25 | 25 |
| Mid-air Attack STA Cost | 30 | 30 | 30 | 30 | 30 | 30 | 30 | 30 | 30 | 30 |
Transform sound into feathers, dealing Havoc DMG.
| Stat | Lv 1 | Lv 2 | Lv 3 | Lv 4 | Lv 5 | Lv 6 | Lv 7 | Lv 8 | Lv 9 | Lv 10 |
|---|---|---|---|---|---|---|---|---|---|---|
| Skill DMG | 144.00%*2 | 155.81%*2 | 167.62%*2 | 184.15%*2 | 195.96%*2 | 209.54%*2 | 228.43%*2 | 247.32%*2 | 266.22%*2 | 286.29%*2 |
| Cooldown | 12 | 12 | 12 | 12 | 12 | 12 | 12 | 12 | 12 | 12 |
| Concerto Regen | 15 | 15 | 15 | 15 | 15 | 15 | 15 | 15 | 15 | 15 |
Devastation
When "Umbra" is full, hold Basic Attack to cast Devastation to attack the target, dealing Havoc DMG, considered as Heavy Attack DMG.
Dark Surge
After casting Devastation, Rover enters the Dark Surge state. In this state:
- Basic Attack is replaced with Enhanced Basic Attack, which performs up to 5 consecutive attacks, dealing Havoc DMG.
- Heavy Attack is replaced with Enhanced Heavy Attack;
- Use Basic Attack after casting Enhanced Heavy Attack to cast Heavy Attack Thwackblade to attack the target, dealing Havoc DMG, considered as Heavy Attack DMG.
- Use Basic Attack after casting Heavy Attack Thwackblade to cast Enhanced Basic Attack 3 to attack the target, dealing Havoc DMG;
- Resonance Skill Wingblade is replaced with Resonance Skill Lifetaker, transforming sounds into blades to attack the target, dealing Havoc DMG.
Umbra
Rover can hold up to 100 points of Umbra.
Normal Attack Tuneslayer recovers Umbra on hit.
Resonance Skill Wingblade recovers Umbra when cast.
Resonance Skill Lifetaker recovers Umbra when cast.
Intro Skill Instant of Annihilation recovers Umbra when cast.
| Stat | Lv 1 | Lv 2 | Lv 3 | Lv 4 | Lv 5 | Lv 6 | Lv 7 | Lv 8 | Lv 9 | Lv 10 |
|---|---|---|---|---|---|---|---|---|---|---|
| Devastation Damage | 114.75% | 124.16% | 133.57% | 146.75% | 156.16% | 166.98% | 182.03% | 197.09% | 212.14% | 228.14% |
| Umbra: Basic Attack Stage 1 DMG | 28.35% | 30.68% | 33.00% | 36.26% | 38.58% | 41.26% | 44.98% | 48.70% | 52.42% | 56.37% |
| Umbra: Basic Attack Stage 2 DMG | 47.25% | 51.13% | 55.00% | 60.43% | 64.30% | 68.76% | 74.96% | 81.16% | 87.36% | 93.94% |
| Umbra: Basic Attack Stage 3 DMG | 78.30% | 84.73% | 91.15% | 100.14% | 106.56% | 113.94% | 124.21% | 134.49% | 144.76% | 155.67% |
| Umbra: Basic Attack Stage 4 DMG | 18.68%*3+56.03% | 20.21%*3+60.62% | 21.74%*3+65.22% | 23.89%*3+71.65% | 25.42%*3+76.24% | 27.18%*3+81.53% | 29.63%*3+88.88% | 32.08%*3+96.23% | 34.53%*3+103.58% | 37.13%*3+111.39% |
| Umbra: Basic Attack Stage 5 DMG | 14.35%*4+57.38% | 15.52%*4+62.08% | 16.70%*4+66.79% | 18.35%*4+73.38% | 19.52%*4+78.08% | 20.88%*4+83.49% | 22.76%*4+91.02% | 24.64%*4+98.55% | 26.52%*4+106.07% | 28.52%*4+114.07% |
| Umbra: Heavy Attack DMG | 64.80% | 70.12% | 75.43% | 82.87% | 88.18% | 94.30% | 102.80% | 111.30% | 119.80% | 128.83% |
| Umbra: Thwackblade Damage | 63.70%+5.00%*4 | 68.93%+5.41%*4 | 74.15%+5.82%*4 | 81.46%+6.40%*4 | 86.69%+6.81%*4 | 92.69%+7.28%*4 | 101.05%+7.94%*4 | 109.41%+8.59%*4 | 117.77%+9.25%*4 | 126.65%+9.95%*4 |
| Umbra: Plunging Attack DMG | 62.00% | 67.09% | 72.17% | 79.29% | 84.37% | 90.22% | 98.36% | 106.49% | 114.62% | 123.27% |
| Umbra: Dodge Counter DMG | 159.30% | 172.37% | 185.43% | 203.72% | 216.78% | 231.80% | 252.70% | 273.60% | 294.50% | 316.71% |
| Umbra: Heavy Attack STA Cost | 25 | 25 | 25 | 25 | 25 | 25 | 25 | 25 | 25 | 25 |
| Umbra: Plunging STA Cost | 30 | 30 | 30 | 30 | 30 | 30 | 30 | 30 | 30 | 30 |
| Umbra: Lifetaker Damage | 139.00%*2+5.00%*4 | 150.40%*2+5.41%*4 | 161.80%*2+5.82%*4 | 177.76%*2+6.40%*4 | 189.16%*2+6.81%*4 | 202.26%*2+7.28%*4 | 220.50%*2+7.94%*4 | 238.74%*2+8.59%*4 | 256.97%*2+9.25%*4 | 276.35%*2+9.95%*4 |
| Umbra: Lifetaker Cooldown | 12 | 12 | 12 | 12 | 12 | 12 | 12 | 12 | 12 | 12 |
| Lifetaker Concerto Regen | 15 | 15 | 15 | 15 | 15 | 15 | 15 | 15 | 15 | 15 |
Rover gathers resonating sounds to attack targets, dealing Havoc DMG.
| Stat | Lv 1 | Lv 2 | Lv 3 | Lv 4 | Lv 5 | Lv 6 | Lv 7 | Lv 8 | Lv 9 | Lv 10 |
|---|---|---|---|---|---|---|---|---|---|---|
| Skill DMG | 765.00% | 827.73% | 890.46% | 978.29% | 1041.02% | 1113.16% | 1213.52% | 1313.89% | 1414.26% | 1520.90% |
| Cooldown | 16 | 16 | 16 | 16 | 16 | 16 | 16 | 16 | 16 | 16 |
| Resonance Cost | 125 | 125 | 125 | 125 | 125 | 125 | 125 | 125 | 125 | 125 |
| Concerto Regen | 20 | 20 | 20 | 20 | 20 | 20 | 20 | 20 | 20 | 20 |
Attack the target, dealing Havoc DMG.
| Stat | Lv 1 | Lv 2 | Lv 3 | Lv 4 | Lv 5 | Lv 6 | Lv 7 | Lv 8 | Lv 9 | Lv 10 |
|---|---|---|---|---|---|---|---|---|---|---|
| Skill DMG | 100.00% | 108.20% | 116.40% | 127.88% | 136.08% | 145.51% | 158.63% | 171.75% | 184.87% | 198.81% |
| Concerto Regen | 10 | 10 | 10 | 10 | 10 | 10 | 10 | 10 | 10 | 10 |
Rover summons a Havoc Field, dealing Havoc DMG of 143.3% of Rover's ATK to all targets within the range every 2s for 6s.
Skill Upgrade Materials
| Lv 2 | Lv 3 | Lv 4 | Lv 5 | Lv 6 | Lv 7 | Lv 8 | Lv 9 | Lv 10 |
|---|---|---|---|---|---|---|---|---|

Resonance Chain
Resonance Skill DMG Bonus is increased by 30%.
Reset Resonance Skill's Cooldown when Rover enters the Dark Surge state by casting Heavy Attack Devastation.
In the Dark Surge state, Basic Attack 5 restores HP equal to 10% of total HP lost on hit.
Heavy Attack Devastation and Resonance Liberation Deadening Abyss reduces enemy's Havoc RES by 10% for 20s on hit.
In the Dark Surge state, Basic Attack 5 deals an additional Havoc DMG equal to 50% of Basic Attack 5 DMG.
In the Dark Surge state, Rover's Crit. Rate is increased by 25%.
Skill Priority
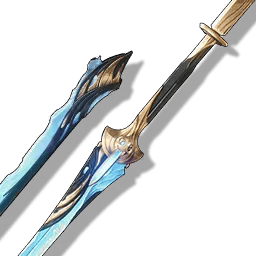
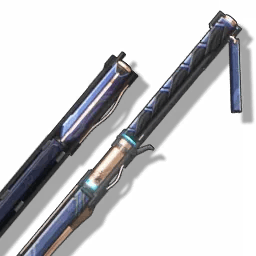
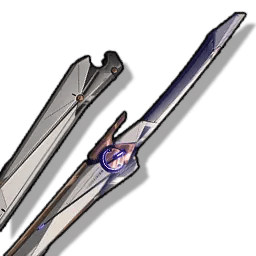
Weapons

Camellya's signature weapon is usable by all Basic Attack focused Sword wielding characters, but clearly designed with her in mind due to a lot of its power locked behind spending Concerto mid-rotation - something only Camellya can do. Offers a decent amount of ATK%, CRIT RATE% and Basic Attack DMG for all characters but a huge Basic Attack DMG bonus after spending Concerto.

Changli's signature weapon that's not only fantastic for her but also usable on all damage-focused Sword users who have a large portion of their damage originating from Resonance Skill damage. Offers a huge main stat of CRIT DMG% granting excellent scaling, 12% permanent ATK% and up to 56% increased Resonance Skill DMG% which should be at or close to full power during the bulk of your rotation when opening with one or two resonance skills.
Outstanding Sword choice, offering significantly higher base damage due to its 5★ rarity, as well as a stackable ATK% buff almost every character can effortlessly get 1 stack of (but with 2 also being easily achievable by most when played correctly). Additionally has a good amount of Energy Regen, which on most characters will allow one sub-stat of Energy Regen to be allocated elsewhere to increase damage even further. Best Sword choice across the board with only S5 4★ Swords having a chance to compete with it.

An amazing, completely free 4* option for characters who have extended field times, providing a rare CRIT Rate boost and loads of ATK. However, due to the nature of its buffs stacking up over time, this sword will deminish a lot in power if the wielder swaps out in less than 10 seconds.
Exceptional all-around generic Sword gaining its bonus close to unconditionally as most Resonators almost always aim to make use of their Intro skill and very few characters spend more than 15 seconds on field during their duration.

Sword option for Heavy and Basic ATK users with an easy to trigger passive - with the only downside being its 10 second time limit. For characters that use their Skill multiple times per rotation, this downside is a non-issue but for Main DPS characters who take up a lot of field time and don't use their skill often this sword can lose value.
Often inferior to Commando of Conviction for DPS, this sword is still a great F2P 4* option for characters who need the energy boost. Realistically however, only consider this option over Commando of Conviction if you have energy problems on your character.
Powerful sword for Resonators spending minimal time on the field - the shorter the better. Best for Hybrid characters executing their rotation fast and infrequently, but less powerful on Main DPS characters that aim to spend extended time on field.
Echo set
Echo set 1
5pcs Set: Havoc DMG + 7.5% after releasing Basic Attack or Heavy Attack. This effect stacks up to 4 times, each stack lasts 15s.
A 5-pc Sun-sinking Eclipse is the best Havoc set for a Havoc Main-DPS like Rover-Havoc. Havoc DMG also increases after a Basic Attack or Heavy Attack which is part of their kit.

Transform into Dreamless and perform 6 consecutive strikes. The first 5 strikes deal 54.08% Havoc DMG each, and the last strike deal 270.40% Havoc DMG.
The DMG of this Echo Skill is increased by 50.00% during the first 5s after Rover: Havoc casts Resonance Liberation: Deadening Abyss.
CD: 20s
Damage of the Dreamless also increases when used after Rover-Havoc's Resonance Liberation which makes them a perfect pair.
Echo stat
Synergies & Team Formation
Synergies


Havoc Rover's best buffer. Granting an amazing 20% Havoc and 25% Basic Attack DMG Amplify on Outro while retaining good personal damage and amazing grouping abilities that Havoc Rover very much benefits from when it comes to their Ultimate and Echo skills, the pair is extremely natural.

Cantarella is a good alternative for Havoc Rover as she offers a 20% Havoc DMG and 25% Skill DMG Amplify on her Outro that they appreciate. Cantarella also has good personal damage and extra heals for added comfort. However, this option is less recommended, as Danjin and Sanhua rotate faster than Cantarella and don't face any Energy Regen problems your team may have to build around, so only use Cantarella if you want the extra heals or like the character. She remains a competitive option though.

Maybe surprising to some, but she's Havoc Rover's best buffer after Roccia, very close to her in strength. Use Danjin with short, low-damage rotations in favour of her 23% Havoc DMG Amplify on Outro that greatly benefits Havoc Rover due to having more than one damage type. This makes for an extremely strong F2P pair!


If you don't want to invest into Danjin but you do have Sanhua, as she's top tier in other teams, she's Havoc Rover's 3rd best option. Following not too far behind Danjin, she has an extremely short rotation time and a 38% Basic ATK DMG Amplify on her Outro that Havoc Rover makes good use of.


One of the usual Healing Support options that can slot into any team. Super easy to use, provides amazing team-wide ATK% buffs and 15% DMG Amplify with one of the fastest rotations in the game.

Similar to Verina, a premium Healing Support option who can not only slot into any team, but also provide insane 12.5% Crit Rate, 25% Crit DMG, 25% ATK and 15% DMG Amplify buffs to your whole team. One of the best but also easy to use characters in the game.
Team Formation
Best Team

F2P Team
Danjin will perform slightly stronger than Sanhua, but feel free to use Sanhua if you don't want to invest into Danjin.
Cantarella Alt
Only use this team if you really want the extra heals — the above teams will yield better results otherwise.
All Comments 0