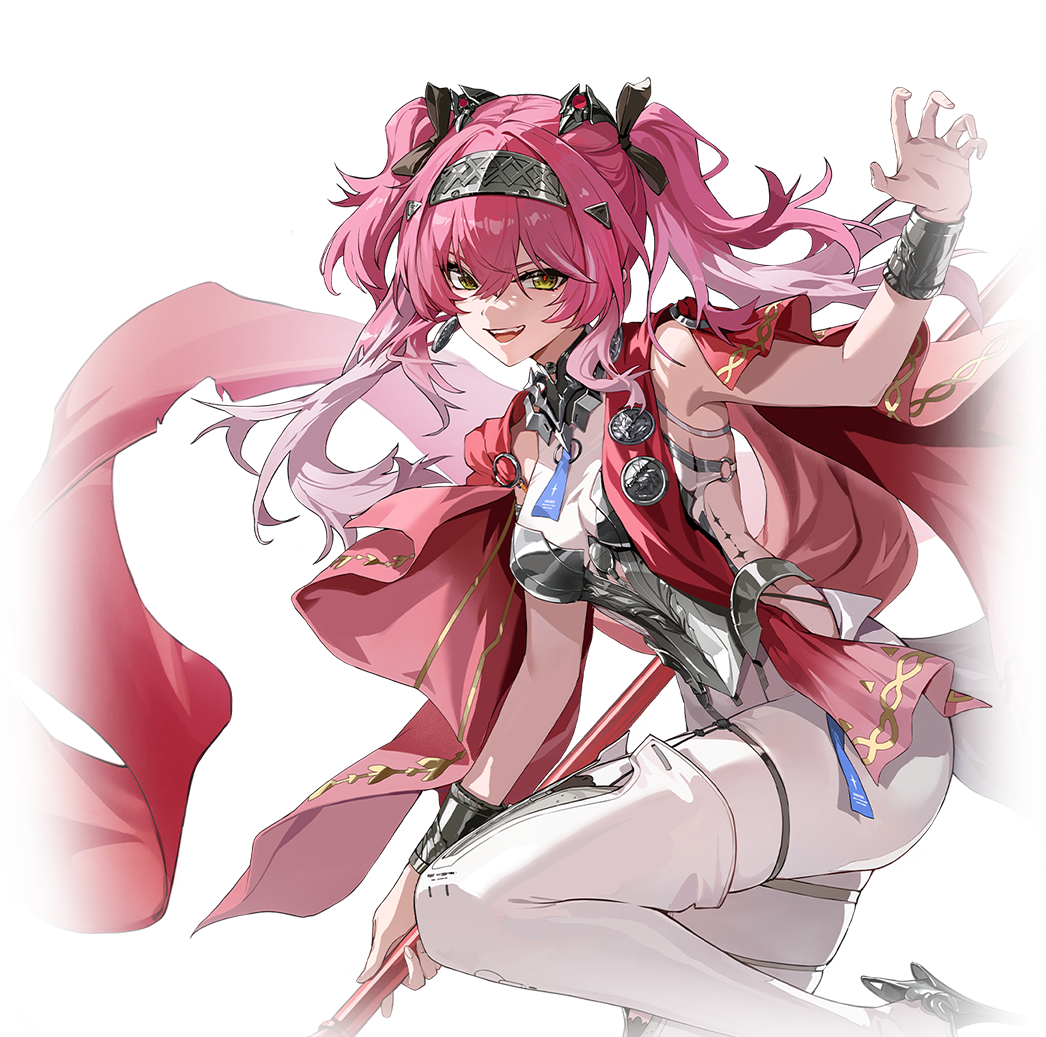
Changli Build Guide, Skills, Combos & Teams Wuthering Waves
Basic Information

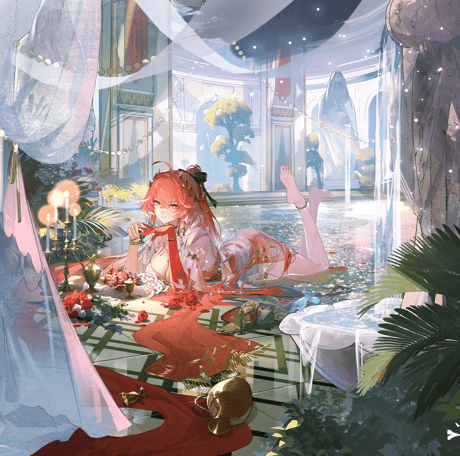

Changli
Changli is a counselor serving the Jinzhou Magistrate, and former Secretary-General in the capital.
Shrouded in flames, she's fated to burn brightly until her final embers.
With her fiery determination and strategic mindset, she rises to power, always thinking ahead to reach her ultimate goal.


Resonator's Stats
Resonator's stats per level
| Stat | Lv 1 | Lv 20 | Lv 40 | Lv 50 | Lv 60 | Lv 70 | Lv 80 | Lv 90 |
|---|---|---|---|---|---|---|---|---|
| | 831 | 2715.46 | 4670.05 | 5924.37 | 7178.59 | 8432.9 | 9687.22 | 10387.5 |
| | 37 | 123.99 | 214.1 | 273.03 | 331.96 | 381.64 | 431.32 | 462.5 |
| | 90 | 289.22 | 495.87 | 628.36 | 760.86 | 893.35 | 1025.84 | 1100 |
Resonator's Graduation Stats
15500+
1800-2400+
1200+
110% - 120%
- Changli's Ultimate is an important part of her damage and something you definitely want to have available right at the point of her rotation where she has 0 Enflamement charges. The reason for this is that her Ultimate grants her maximum Enflamement charges meaning - gaining the Ultimate late will delay your usual rotation or lead to you wasting Enflamement charges neither of which are ideal.
- For this reason, it's recommended you build roughly 10-20% Energy Regen on Changli, but you can get away with 0% depending on the team you pair her with and how much field time you dedicate to other characters.
- If you find yourself missing Changli's Ultimate window and end up wasting Enflamement try to get a little more Energy Regen or mix up your team comps.
60% - 75%+
270% - 300%+
40% - 70%
Level Upgrade Materials
| Lv 20 | Lv 40 | Lv 50 | Lv 60 | Lv 70 | Lv 80 |
|---|---|---|---|---|---|
| |


Skills & Resonance Chains
Skills
Basic Attack
- Perform up to 4 consecutive attacks, dealing Fusion DMG.
- After releasing Basic Attack 4, enter True Sight, lasting for 12s.
Mid-air Attack
- Consume Stamina to perform up to 4 consecutive attacks in mid-air, dealing Fusion DMG.
- After releasing Mid-air Attack 4, enter True Sight, lasting for 12s.
Heavy Attack
- Hold Basic Attack on the ground to perform an upward strike at the cost of Stamina, dealing Fusion DMG. Use Basic Attack within a certain time to release Mid-Air Attack 3.
Mid-air Heavy Attack
- Shortly after holding Basic Attack in mid-air or using Basic Attack True Sight: Charge, use Basic Attack to perform a plunging attack at the cost of Stamina, dealing Fusion DMG. Use Basic Attack within a certain time to release Basic Attack 3.
Dodge Counter
- Use Basic Attack after a successful Dodge to attack the target, dealing Fusion DMG.
| Stat | Lv 1 | Lv 2 | Lv 3 | Lv 4 | Lv 5 | Lv 6 | Lv 7 | Lv 8 | Lv 9 | Lv 10 |
|---|---|---|---|---|---|---|---|---|---|---|
| Basic Attack 1 DMG | 14.84%*2 | 16.05%*2 | 17.27%*2 | 18.97%*2 | 20.19%*2 | 21.59%*2 | 23.53%*2 | 25.48%*2 | 27.43%*2 | 29.49%*2 |
| Basic Attack 2 DMG | 17.85%*2 | 19.32%*2 | 20.78%*2 | 22.83%*2 | 24.30%*2 | 25.98%*2 | 28.32%*2 | 30.66%*2 | 33.00%*2 | 35.49%*2 |
| Basic Attack 3 DMG | 18.34%*3 | 19.84%*3 | 21.34%*3 | 23.45%*3 | 24.95%*3 | 26.68%*3 | 29.08%*3 | 31.49%*3 | 33.89%*3 | 36.45%*3 |
| Basic Attack 4 DMG | 25.50%+14.88%*4 | 27.60%+16.10%*4 | 29.69%+17.32%*4 | 32.61%+19.03%*4 | 34.71%+20.25%*4 | 37.11%+21.65%*4 | 40.46%+23.60%*4 | 43.80%+25.55%*4 | 47.15%+27.50%*4 | 50.70%+29.58%*4 |
| Mid-air Attack 1 DMG | 30.86% | 33.39% | 35.92% | 39.46% | 41.99% | 44.90% | 48.95% | 53.00% | 57.05% | 61.35% |
| Mid-air Attack 2 DMG | 25.59%*2 | 27.69%*2 | 29.79%*2 | 32.72%*2 | 34.82%*2 | 37.23%*2 | 40.59%*2 | 43.95%*2 | 47.30%*2 | 50.87%*2 |
| Mid-air Attack 3 DMG | 22.13%*3 | 23.95%*3 | 25.76%*3 | 28.30%*3 | 30.12%*3 | 32.20%*3 | 35.11%*3 | 38.01%*3 | 40.91%*3 | 44.00%*3 |
| Mid-air Attack 4 DMG | 19.13%+11.16%*4 | 20.70%+12.08%*4 | 22.27%+12.99%*4 | 24.46%+14.27%*4 | 26.03%+15.19%*4 | 27.83%+16.24%*4 | 30.34%+17.70%*4 | 32.85%+19.17%*4 | 35.36%+20.63%*4 | 38.03%+22.18%*4 |
| Heavy Attack | 14.58%*3+18.75% | 15.78%*3+20.28% | 16.97%*3+21.82% | 18.65%*3+23.97% | 19.84%*3+25.51% | 21.22%*3+27.28% | 23.13%*3+29.74% | 25.04%*3+32.20% | 26.95%*3+34.65% | 28.99%*3+37.27% |
| Mid-air Heavy Attack | 62.00% | 67.09% | 72.17% | 79.29% | 84.37% | 90.22% | 98.36% | 106.49% | 114.62% | 123.27% |
| Dodge Counter | 41.57%*3 | 44.98%*3 | 48.39%*3 | 53.16%*3 | 56.57%*3 | 60.49%*3 | 65.94%*3 | 71.40%*3 | 76.85%*3 | 82.64%*3 |
| Mid-air Attack STA Cost | 5 | 5 | 5 | 5 | 5 | 5 | 5 | 5 | 5 | 5 |
| Heavy Attack STA Cost | 25 | 25 | 25 | 25 | 25 | 25 | 25 | 25 | 25 | 25 |
| Mid-air Heavy Attack STA Cost | 30 | 30 | 30 | 30 | 30 | 30 | 30 | 30 | 30 | 30 |
True Sight: Capture
- After releasing Resonance Skill, Changli dashes towards the enemy and enters True Sight, lasting for 12s. In the end, she releases a plunging attack, dealing Fusion DMG.
- True Sight: Capture has 2 initial charges and holds up to 2 charges at maximum. The number of charges is replenished by 1 every 12s.
- Can be cast in mid-air.
Basic Attack: True Sight - Conquest
- When in True Sight, if Changli uses Ground Basic Attack, she releases True Sight: Conquest, dashing towards the enemy and dealing Fusion DMG, considered as Resonance Skill DMG. After releasing True Sight: Conquest, True Sight ends.
Basic Attack: True Sight - Charge
- When in True Sight, if Changli jumps or uses Basic Attack in mid-air, she releases True Sight: Charge, dashing towards the enemy and dealing Fusion DMG, considered as Resonance Skill DMG. After releasing True Sight: Charge, True Sight ends.
| Stat | Lv 1 | Lv 2 | Lv 3 | Lv 4 | Lv 5 | Lv 6 | Lv 7 | Lv 8 | Lv 9 | Lv 10 |
|---|---|---|---|---|---|---|---|---|---|---|
| True Sight: Capture DMG | 41.19%*3+82.37% | 44.57%*3+89.13% | 47.94%*3+95.88% | 52.67%*3+105.34% | 56.05%*3+112.09% | 59.93%*3+119.86% | 65.34%*3+130.67% | 70.74%*3+141.47% | 76.14%*3+152.28% | 81.88%*3+163.76% |
| True Sight: Conquest DMG | 29.65%*2+41.51%+47.44% | 32.08%*2+44.91%+51.33% | 34.51%*2+48.32%+55.22% | 37.92%*2+53.08%+60.67% | 40.35%*2+56.49%+64.56% | 43.14%*2+60.40%+69.03% | 47.03%*2+65.85%+75.25% | 50.92%*2+71.29%+81.48% | 54.81%*2+76.74%+87.70% | 58.95%*2+82.52%+94.31% |
| True Sight: Charge DMG | 36.56%+54.84% | 39.56%+59.34% | 42.56%+63.83% | 46.75%+70.13% | 49.75%+74.62% | 53.20%+79.80% | 58.00%+86.99% | 62.79%+94.18% | 67.59%+101.38% | 72.68%+109.02% |
| True Sight: Capture - Concerto Regen | 14 | 14 | 14 | 14 | 14 | 14 | 14 | 14 | 14 | 14 |
| True Sight: Conquest - Concerto Regen | 7 | 7 | 7 | 7 | 7 | 7 | 7 | 7 | 7 | 7 |
| True Sight: Charge - Concerto Regen | 6 | 6 | 6 | 6 | 6 | 6 | 6 | 6 | 6 | 6 |
Heavy Attack: Flaming Sacrifice
- When releasing Heavy Attack, if Changli carries 4 stacks of Enflamement, she consumes all stacks of Enflamement to cast Flaming Sacrifice, dealing Fusion DMG, considered as Resonance Skill DMG.
- While casting Flaming Sacrifice, Changli takes 40% less DMG.
Enflamement
- Changli can hold up to 4 stacks of Enflamement.
- Changli obtains 1 stack of Enflamement for every Basic Attack: True Sight - Conquest on hit.
- Changli obtains 1 stack of Enflamement for every Basic Attack: True Sight - Charge on hit.
- Changli obtains 4 stacks of Enflamement for every Resonance Liberation Radiance of Fealty.
| Stat | Lv 1 | Lv 2 | Lv 3 | Lv 4 | Lv 5 | Lv 6 | Lv 7 | Lv 8 | Lv 9 | Lv 10 |
|---|---|---|---|---|---|---|---|---|---|---|
| Flaming Sacrifice DMG | 19.74%*5+230.30% | 21.36%*5+249.18% | 22.98%*5+268.07% | 25.25%*5+294.51% | 26.87%*5+313.39% | 28.73%*5+335.11% | 31.32%*5+365.32% | 33.91%*5+395.54% | 36.50%*5+425.75% | 39.25%*5+457.85% |
| Concerto Regen | 10 | 10 | 10 | 10 | 10 | 10 | 10 | 10 | 10 | 10 |
- Deal Fusion DMG to nearby targets, obtaining 4 stacks of Enflamement, and entering Fiery Feather.
- Can be cast in mid-air.
Fiery Feather
- When Changli releases Heavy Attack Flaming Sacrifice within 10s, her ATK is increased by 25%, after which Fiery Feather ends.
| Stat | Lv 1 | Lv 2 | Lv 3 | Lv 4 | Lv 5 | Lv 6 | Lv 7 | Lv 8 | Lv 9 | Lv 10 |
|---|---|---|---|---|---|---|---|---|---|---|
| Skill DMG | 610.00% | 660.02% | 710.04% | 780.07% | 830.09% | 887.62% | 967.65% | 1047.68% | 1127.71% | 1212.75% |
| Cooldown | 20 | 20 | 20 | 20 | 20 | 20 | 20 | 20 | 20 | 20 |
| Resonance Cost | 125 | 125 | 125 | 125 | 125 | 125 | 125 | 125 | 125 | 125 |
| Concerto Regen | 20 | 20 | 20 | 20 | 20 | 20 | 20 | 20 | 20 | 20 |
- Changli appears in mid-air, attacks the target, and enters True Sight, lasting for 12s.
| Stat | Lv 1 | Lv 2 | Lv 3 | Lv 4 | Lv 5 | Lv 6 | Lv 7 | Lv 8 | Lv 9 | Lv 10 |
|---|---|---|---|---|---|---|---|---|---|---|
| Skill DMG | 22.38%+13.06%*4 | 24.22%+14.13%*4 | 26.06%+15.20%*4 | 28.62%+16.70%*4 | 30.46%+17.77%*4 | 32.57%+19.00%*4 | 35.51%+20.71%*4 | 38.44%+22.43%*4 | 41.38%+24.14%*4 | 44.50%+25.96%*4 |
| Concerto Regen | 10 | 10 | 10 | 10 | 10 | 10 | 10 | 10 | 10 | 10 |
- The incoming Resonator has their Fusion DMG Amplified by 20% and Resonance Liberation DMG Amplified by 25% for 10s or until the Resonator is switched out.
Skill Upgrade Materials
| Lv 2 | Lv 3 | Lv 4 | Lv 5 | Lv 6 | Lv 7 | Lv 8 | Lv 9 | Lv 10 |
|---|---|---|---|---|---|---|---|---|


Resonance Chain
- Resonance Skill Tripartite Flames and Heavy Attack Flaming Sacrifice increase Changli's DMG dealt by 10% and resistance to interruption.
- Enflamement increases Changli's Crit. Rate by 25% for 8s.
- Resonance Liberation Radiance of Fealty DMG is increased by 80%.
- After Intro Skill is cast, all team members' ATK is increased by 20% for 30s.
- Heavy Attack Flaming Sacrifice's Multiplier is increased by 50% and its DMG dealt is increased by 50%.
- Resonance Skill Tripartite Flames, Heavy Attack Flaming Sacrifice, and Resonance Liberation Radiance of Fealty ignore an additional 40% of the target's DEF when dealing damage.
Skill Priority
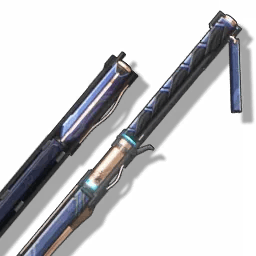
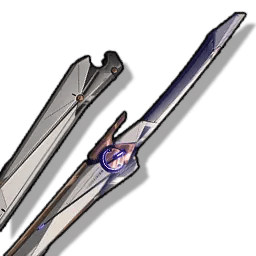
Weapons

Changli's signature weapon that's not only fantastic for her but also usable on all damage-focused Sword users who have a large portion of their damage originating from Resonance Skill damage. Offers a huge main stat of CRIT DMG% granting excellent scaling, 12% permanent ATK% and up to 56% increased Resonance Skill DMG% which should be at or close to full power during the bulk of your rotation when opening with one or two resonance skills.
Outstanding Sword choice, offering significantly higher base damage due to its 5★ rarity, as well as a stackable ATK% buff almost every character can effortlessly get 1 stack of (but with 2 also being easily achievable by most when played correctly). Additionally has a good amount of Energy Regen, which on most characters will allow one sub-stat of Energy Regen to be allocated elsewhere to increase damage even further. Best Sword choice across the board with only S5 4★ Swords having a chance to compete with it.

Camellya's signature weapon is usable by all Basic Attack focused Sword wielding characters, but clearly designed with her in mind due to a lot of its power locked behind spending Concerto mid-rotation - something only Camellya can do. Offers a decent amount of ATK%, CRIT RATE% and Basic Attack DMG for all characters but a huge Basic Attack DMG bonus after spending Concerto.
Exceptional all-around generic Sword gaining its bonus close to unconditionally as most Resonators almost always aim to make use of their Intro skill and very few characters spend more than 15 seconds on field during their duration.
Often inferior to Commando of Conviction for DPS, this sword is still a great F2P 4* option for characters who need the energy boost. Realistically however, only consider this option over Commando of Conviction if you have energy problems on your character.

Powerful sword for Resonators spending minimal time on the field - the shorter the better. Best for Hybrid characters executing their rotation fast and infrequently, but less powerful on Main DPS characters that aim to spend extended time on field.

An amazing, completely free 4* option for characters who have extended field times, providing a rare CRIT Rate boost and loads of ATK. However, due to the nature of its buffs stacking up over time, this sword will deminish a lot in power if the wielder swaps out in less than 10 seconds.

Sword option for Heavy and Basic ATK users with an easy to trigger passive - with the only downside being its 10 second time limit. For characters that use their Skill multiple times per rotation, this downside is a non-issue but for Main DPS characters who take up a lot of field time and don't use their skill often this sword can lose value.
Echo set
Echo set 1
5pcs Set: Fusion DMG + 30% for 15s after releasing Resonance Skill.
The 5-pc Molten Rift set straight up increases Changli's Fusion DMG. The damage increases even more after using a Resonance Skill - a perfect fit for Changli because Resonance Skill usage is part of her overall kit.

Transform into Nightmare: Inferno Rider and jump to attack enemies in front, dealing 405.00% Fusion DMG.
The Resonator with this Echo equipped in their main slot gains 12.00% Fusion DMG Bonus and 12.00% Resonance Skill DMG Bonus.
Hold Echo Skill to transform into Nightmare: Inferno Rider and enter Riding Mode. When exiting Riding Mode, deal 283.50% Fusion DMG to enemies in front.
CD: 25s.
Passively increases Changli's Fusion DMG and Resonance Skill DMG.

Transform into the Inferno Rider to launch up to 3 consecutive slashes in a row, each slash dealing 242.40%, 282.80%, and 282.80% Fusion DMG respectively.
After the final hit, increase the current Resonator's Fusion DMG by 12.00% and Basic Attack DMG by 12.00% for 15s.
Long press the Echo Skill to transform into the Inferno Rider and enter Riding Mode. When exiting Riding Mode, deal 282.80% Fusion DMG to enemies in front.
CD: 20s
The best early game option for Changli, especially when players cannot access Rinascita yet. Provides more damage than Nightmare: Inferno Rider. The downside to using this is that Echo Skill must be included in rotations for Changli to get the buff.
Echo stat
Synergies & Team Formation
Synergies


Changli's best partner for the overwhelming majority of players. The most of Changli's abilities are able to make great use of Brant's massive 20% Fusion and 25% Skill DMG Amplify Outro, causing a big boost to her damage, and Brant's personal damage is nothing to scoff at either. This makes the pair very natural together but also very strong; although be careful as Brant's Outro buff is lost when you switch Changli out.
Lupa is part of Changli's best team as she is the best buffer for mono Fusion teams, with for example Changli and Brant or Encore as the perfect Dual DPS core. Thanks to her massive boosts to Fusion ATK and DMG Bonus in teams with 3 Fusion characters, she makes for a great partner, but we recommend against using Changli to receive Lupa's Outro buff as Changli deals little to no Basic Attack DMG.
Leaning towards the easier-to-play side of Dual DPS teams, Chixia stands out as the only character currently being able to fully utilize Changli's Outro skill (20% Fusion and 25% Liberation DMG Amplify) and she's able to dish out some great damage because of it, on top of Changli's good personal damage, making the two a good pair.

A very good Main DPS option who can be supported by Changli via her Outro skill, which amplifies Fusion DMG by 20%. Combining their two good personal damage numbers together makes for a very solid team that can clear content easily when learnt. Be careful with this one as this is a step-up in difficulty compared to single DPS teams.


The infamous hardcore Dual DPS pair for Changli, who can deal huge damage in long swap-cancellable windows that Changli uses to amazing effect. Additionally, Changli's 25% Liberation DMG Outro buff is appreciated to buff Xiangli Yao's key abilities like his ultimate nuke. When learnt, this duo deals monstrous damage. We however don't recommend it to any casual players, as its difficulty can just make it a bad team damage-wise if not properly played.


The teacher and student duo is famous not only for having some of the highest Expert quickswap DPS in the game, but also for being amazing in the new Whimpering Wastes mode — able to clear tons of waves very quickly when played right, this Expert quickswap duo won't disappoint if you play it right; however, that's a tremendous ask in terms of difficulty, so be careful, it might not net good results for casual players.


A particularly fun and fast duo with Changli, who's free to use, sports proper damage and is fully quickswap friendly. Still a difficult team to properly get the hang of, but not too much to still dish out good damage.

One of the usual Healing Support options that can slot into any team. Super easy to use, provides amazing team-wide ATK% buffs and 15% DMG Amplify with one of the fastest rotations in the game.

Similar to Verina, a premium Healing Support option who can not only slot into any team, but also provide insane 12.5% Crit Rate, 25% Crit DMG, 25% ATK and 15% DMG Amplify buffs to your whole team. One of the best but also easy to use characters in the game.
Team Formation
Best Team

Expert Team
VERY difficult teams to play, won't net good results for most. Pick your second teammate based on preference in strengths/playstyle. Verina is always stronger with Jinhsi.
Dual Fusion Team
Budget Dual DPS Team
This is a budget team so don't expect the best performance here — however it'll still work well.
More Info
Cherished Items
 Firmament Weiqi Manual
 A battered weiqi manual, documenting the legendary games left by a peculiar visitor at Mt. Firmament.
The pages have yellowed over the long years and dog-eared from countless readings. This manuscript once accompanied its owner through many perilous and lonely paths. Now it has been restored and rebound, with new pages added, ready to record new games.
Now that the worthy opponent she has been seeking stands before her, another historic game to be remembered and studied for centuries shall take place. As long as the players remain, the pages will continue to be filled.
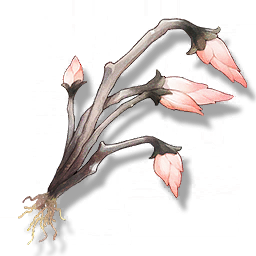
 Flame-Soaked Cloth
 A fabric of unknown material, soft to the touch and said to be fireproof. After being cleansed by flames, it becomes even cleaner and whiter, like freshly fallen snow. The plants required to weave this fabric went extinct during the Lament and are now almost impossible to obtain, making every remaining piece extremely precious.
After the Appointment Ceremony, the new Magistrate of Jinzhou presented it as a gift to her esteemed teacher.
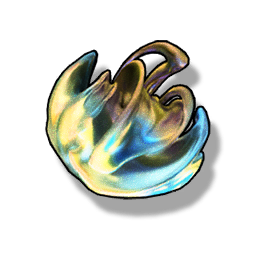
 Blaze Feather
 One of two feathers formed by Changli's flames. One of these feathers has been gifted to a distinguished guest of Jinzhou, while the other Changli keeps close to herself.
It is seemingly weightless, as if it could burn forever. However, it never harms anyone who holds it, instead offering a comforting warmth, reflecting Changli's near impeccable mastery of her Forte. Like her robe, the feather is entirely made of flames.
In bedtime stories once told to a young girl, a fire-born phoenix would bestow its most precious tail feather upon the person it held most dear.
All Comments 0