Cantarella Build Guide, Skills, Combos & Teams Wuthering Waves
Basic Information


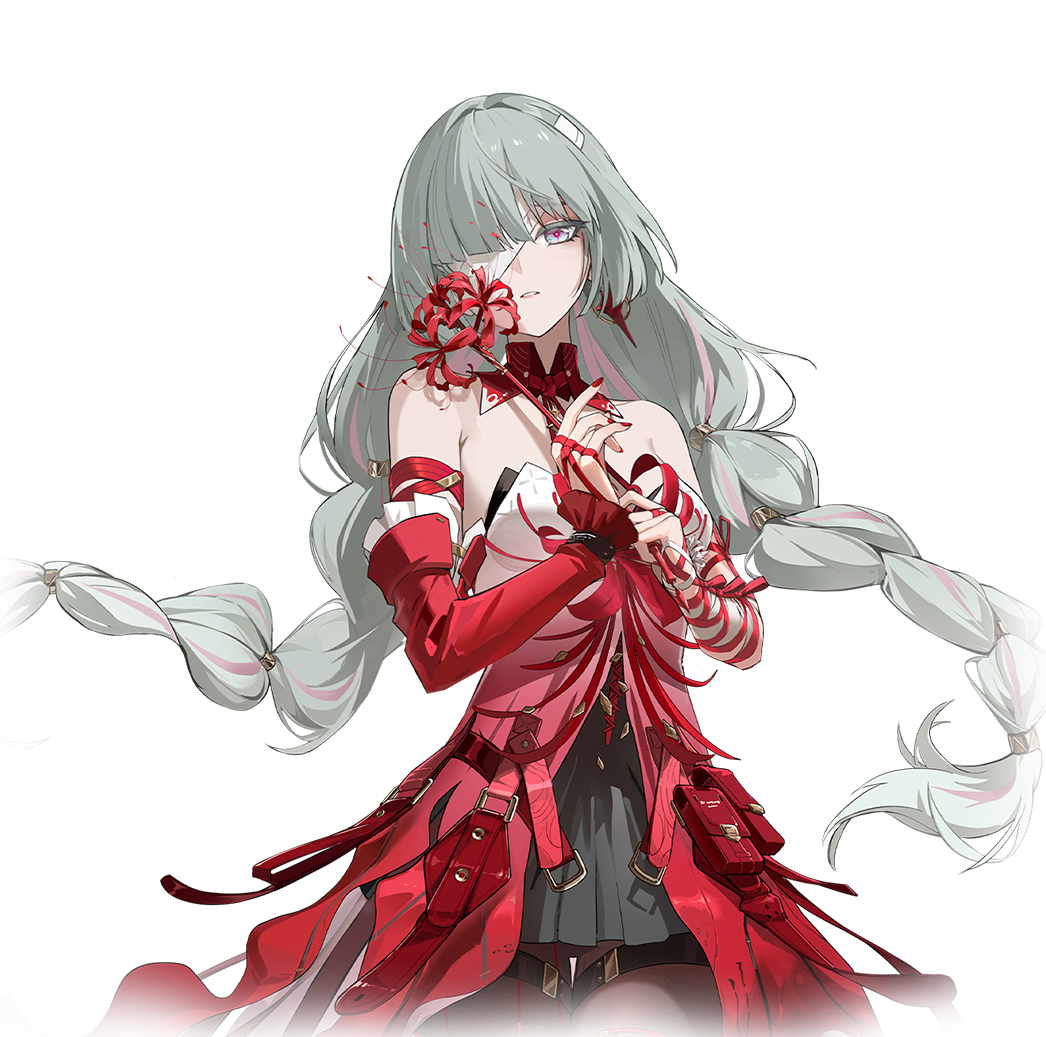
Cantarella
The current head of Fisalia, Cantarella, the Bane. A mysterious noblewoman, her beauty as captivating as it is perilous. She resides in a crown-like castle perched atop the mountain, where illusory dreams flow like streams, meticulously spun by her own hands.


Resonator's Stats
Resonator's stats per level
| Stat | Lv 1 | Lv 20 | Lv 40 | Lv 50 | Lv 60 | Lv 70 | Lv 80 | Lv 90 |
|---|---|---|---|---|---|---|---|---|
| | 928 | 3032.43 | 5215.17 | 6615.9 | 8016.53 | 9417.25 | 10817.97 | 11600 |
| | 32 | 107.24 | 185.17 | 236.13 | 287.1 | 330.07 | 373.03 | 400 |
| | 90 | 289.22 | 495.87 | 628.36 | 760.86 | 893.35 | 1025.84 | 1100 |
Resonator's Graduation Stats
16000+
1500 - 2200+
1100+
140% - 150%
- Cantarella requires a significant amount of ER to perform her optimal rotation. The amount of ER she requires will depend on the teammates she is supporting.
- For most teams, we recommend building between 140% - 150% ER. As always, you may be able to get away with less (or need more), depending on your specific circumstances.
60% - 70%+
270% - 290%+
30% - 82%+ (Depending on set and echo used)
Level Upgrade Materials
| Lv 20 | Lv 40 | Lv 50 | Lv 60 | Lv 70 | Lv 80 |
|---|---|---|---|---|---|
| |


Skills & Resonance Chains
Skills
Basic Attack
- Perform up to 3 consecutive attacks, dealing Havoc DMG.
Heavy Attack
- Consume STA to attack the target, dealing Havoc DMG.
Heavy Attack - Delusive Dive
- When Cantarella has Trance, Heavy Attack becomes Delusive Dive, dealing Havoc DMG to the target, and then Cantarella enters Mirage. While in Mirage, casting Delusive Dive does not activate Mirage again.
- Can be cast in water.
Mid-air Attack
- Consume STA to perform Plunging Attack, dealing Havoc DMG.
Dodge Counter
- Press Normal Attack right after a successful Dodge to attack the target, dealing Havoc DMG.
| Stat | Lv 1 | Lv 2 | Lv 3 | Lv 4 | Lv 5 | Lv 6 | Lv 7 | Lv 8 | Lv 9 | Lv 10 |
|---|---|---|---|---|---|---|---|---|---|---|
| Stage 1 DMG | 40.00% | 43.28% | 46.56% | 51.16% | 54.44% | 58.21% | 63.46% | 68.70% | 73.95% | 79.53% |
| Stage 2 DMG | 18.33%*4 | 19.83%*4 | 21.34%*4 | 23.44%*4 | 24.94%*4 | 26.67%*4 | 29.07%*4 | 31.48%*4 | 33.88%*4 | 36.44%*4 |
| Stage 3 DMG | 36.50%*2 | 39.50%*2 | 42.49%*2 | 46.68%*2 | 49.67%*2 | 53.12%*2 | 57.90%*2 | 62.69%*2 | 67.48%*2 | 72.57%*2 |
| Heavy Attack DMG | 28.76%*2 | 31.12%*2 | 33.48%*2 | 36.78%*2 | 39.14%*2 | 41.85%*2 | 45.63%*2 | 49.40%*2 | 53.17%*2 | 57.18%*2 |
| Delusive Dive DMG | 26.68%*2 | 28.87%*2 | 31.06%*2 | 34.12%*2 | 36.31%*2 | 38.83%*2 | 42.33%*2 | 45.83%*2 | 49.33%*2 | 53.05%*2 |
| Mid-air Attack DMG | 21.12%+31.68% | 22.86%+34.28% | 24.59%+36.88% | 27.01%+40.52% | 28.75%+43.12% | 30.74%+46.10% | 33.51%+50.26% | 36.28%+54.42% | 39.05%+58.57% | 41.99%+62.99% |
| Dodge Counter DMG | 26.66%*4 | 28.85%*4 | 31.04%*4 | 34.10%*4 | 36.28%*4 | 38.80%*4 | 42.30%*4 | 45.79%*4 | 49.29%*4 | 53.01%*4 |
| Heavy Attack STA Cost | 20 | 20 | 20 | 20 | 20 | 20 | 20 | 20 | 20 | 20 |
| Mid-air Attack STA Cost | 30 | 30 | 30 | 30 | 30 | 30 | 30 | 30 | 30 | 30 |
Graceful Step
- Attack the target, dealing Havoc DMG.
Flickering Reverie
- When in Mirage, Resonance Skill becomes Flickering Reverie, which is considered an Echo Skill when being cast. Attack the target, dealing Havoc DMG, and send them into Hazy Dream.
- Can be cast in mid-air.
Hazy Dream
- Reduce the target's movement speed for 6.5s. When the target takes damage, Jolt is triggered once, removing Hazy Dream to deal Havoc DMG, considered Basic Attack DMG.
- Attacks by other Resonators in the team will not Jolt a target influenced by Hazy Dream and will remove the Hazy Dream.
- Coordinated Attacks and damage from Utilities will not Jolt a target.
| Stat | Lv 1 | Lv 2 | Lv 3 | Lv 4 | Lv 5 | Lv 6 | Lv 7 | Lv 8 | Lv 9 | Lv 10 |
|---|---|---|---|---|---|---|---|---|---|---|
| Graceful Step DMG | 37.02%*2 | 40.06%*2 | 43.10%*2 | 47.35%*2 | 50.38%*2 | 53.87%*2 | 58.73%*2 | 63.59%*2 | 68.44%*2 | 73.60%*2 |
| Flickering Reverie DMG | 98.70% | 106.80% | 114.89% | 126.22% | 134.32% | 143.62% | 156.57% | 169.52% | 182.47% | 196.23% |
| Jolt DMG | 100.00% | 108.20% | 116.40% | 127.88% | 136.08% | 145.51% | 158.63% | 171.75% | 184.87% | 198.81% |
| Graceful Step Cooldown | 6 | 6 | 6 | 6 | 6 | 6 | 6 | 6 | 6 | 6 |
| Flickering Reverie Cooldown | 12 | 12 | 12 | 12 | 12 | 12 | 12 | 12 | 12 | 12 |
| Graceful Step Concerto Regen | 10 | 10 | 10 | 10 | 10 | 10 | 10 | 10 | 10 | 10 |
| Flickering Reverie Concerto Regen | 10 | 10 | 10 | 10 | 10 | 10 | 10 | 10 | 10 | 10 |
Mirage
- Basic Attack becomes Basic Attack Phantom Sting. Perform up to 3 consecutive attacks, dealing Havoc DMG. Can be cast in mid-air. When cast mid-air, Basic Attack Phantom Sting consumes STA, and the combo does not reset when Cantarella is airborne.
- Hitting the target with Basic Attack Phantom Sting consumes 1 points of Trance to obtain 1 points of Shiver and heal all nearby Resonators in the team.
- The third stage of Basic Attack Phantom Sting triggers 3 Coordinated Attacks, dealing Havoc DMG.
- Mid-air Attack becomes Abysmal Vortex. Press Jump to perform a Plunging Attack at the cost of STA, dealing Havoc DMG.
- Dodge Counter becomes Dodge Counter Shadowy Sweep. Attack the target, dealing Havoc DMG. Press Normal Attack right after casting the skill to cast Basic Attack Phantom Sting Stage 2.
- When Mid-air Attack Abysmal Vortex or Dodge Counter Shadowy Sweep hits a target, consume 1 points of Trance to obtain 1 points of Shiver and heal all nearby Resonators in the team.
- Mirage lasts for 8s.
- Mirage ends when Trance is depleted.
Forte Circuit - Perception Drain
- If Cantarella has 3 points of Shiver when in Mirage, Resonance Skill becomes Perception Drain.
- Consume all Shiver to attack the target, dealing Havoc DMG, considered Basic Attack DMG. Send the target into Hazy Dream and heal all Resonators in the team.
- Casting this skill is also considered as casting Echo Skill.
- Can be cast in mid-air.
Abyssal Rebirth
- After casting Intro Skill, Cantarella enters Abyssal Rebirth, which lasts for 25s and can be activated once every 25s. In the duration, for up to 6 times, when Resonators in the team cast Echo Skill, Cantarella recovers 6 points of Concerto Energy. Echoes with the same name can only trigger this effect once.
- When in water, Cantarella's swimming speed increases and STA cost decreases.
Trance
- Cantarella can hold up to 5 points of Trance.
- Casting Intro Skill recovers 1 points of Trance.
- Hitting a target with Basic Attack Stage 3 recovers 1 points of Trance.
- Casting Resonance Skill Graceful Step recovers 1 points of Trance.
- Casting Resonance Liberation Flowing Suffocation recovers 3 points of Trance.
- When in the water, recover 1 points of Trance every 5s.
Shiver
- Cantarella can hold up to 3 points of Shiver.
- Hitting the target with Basic Attack Phantom Sting recovers 1 points of Shiver.
- When Mid-air Attack Abysmal Vortex or Dodge Counter Shadowy Sweep hits a target, restore 1 points of Shiver.
| Stat | Lv 1 | Lv 2 | Lv 3 | Lv 4 | Lv 5 | Lv 6 | Lv 7 | Lv 8 | Lv 9 | Lv 10 |
|---|---|---|---|---|---|---|---|---|---|---|
| Phantom Sting Stage 1 DMG | 17.77%*3 | 19.23%*3 | 20.69%*3 | 22.73%*3 | 24.18%*3 | 25.86%*3 | 28.19%*3 | 30.52%*3 | 32.85%*3 | 35.33%*3 |
| Phantom Sting Stage 2 DMG | 31.65%*2 | 34.25%*2 | 36.85%*2 | 40.48%*2 | 43.07%*2 | 46.06%*2 | 50.21%*2 | 54.36%*2 | 58.52%*2 | 62.93%*2 |
| Phantom Sting Stage 3 DMG | 32.50%*4 | 35.17%*4 | 37.83%*4 | 41.57%*4 | 44.23%*4 | 47.30%*4 | 51.56%*4 | 55.82%*4 | 60.09%*4 | 64.62%*4 |
| Abysmal Vortex DMG | 21.12%+31.68% | 22.86%+34.28% | 24.59%+36.88% | 27.01%+40.52% | 28.75%+43.12% | 30.74%+46.10% | 33.51%+50.26% | 36.28%+54.42% | 39.05%+58.57% | 41.99%+62.99% |
| Perception Drain DMG | 336.00%*2 | 363.55%*2 | 391.10%*2 | 429.67%*2 | 457.22%*2 | 488.91%*2 | 532.99%*2 | 577.07%*2 | 621.15%*2 | 667.99%*2 |
| Shadowy Sweep DMG | 37.77%*3 | 40.87%*3 | 43.97%*3 | 48.30%*3 | 51.40%*3 | 54.96%*3 | 59.91%*3 | 64.87%*3 | 69.82%*3 | 75.09%*3 |
| Healing by Consuming Trance | 90+21.60% | 100+22.46% | 112+23.33% | 126+24.62% | 142+26.35% | 157+28.08% | 160+31.32% | 163+34.99% | 166+38.88% | 171+45.36% |
| Perception Drain Healing | 375+90.00% | 420+93.60% | 468+97.20% | 525+102.60% | 592+109.80% | 656+117.00% | 667+130.50% | 682+145.80% | 693+162.00% | 712+189.00% |
| Mid-air Phantom Sting STA cost | 5 | 5 | 5 | 5 | 5 | 5 | 5 | 5 | 5 | 5 |
| Abysmal Vortex STA Cost | 30 | 30 | 30 | 30 | 30 | 30 | 30 | 30 | 30 | 30 |
| Mirage Duration | 8 | 8 | 8 | 8 | 8 | 8 | 8 | 8 | 8 | 8 |
| Perception Drain Cooldown | 18 | 18 | 18 | 18 | 18 | 18 | 18 | 18 | 18 | 18 |
| Perception Drain Concerto Regen | 12 | 12 | 12 | 12 | 12 | 12 | 12 | 12 | 12 | 12 |
Flowing Suffocation
- Attack the target, dealing Havoc DMG (considered Basic Attack DMG). Grant Diffusion to all Resonators in the team. Casting this skill is also considered as casting Echo Skill.
- Can be cast in mid-air close to the ground.
Diffusion
- When the Resonator on the field deals damage to a target, summon Dreamweavers to perform Coordinated Attack, dealing Havoc DMG (considered as Basic Attack DMG).
- Within 3s after the Resonator deals damage, summon 1 Dreamweavers per second. This effect can be triggered once per second. Damage dealt by Dreamweavers cannot trigger this effect.
- Up to 1 Dreamweavers can be summoned each second, max 21 Dreamweavers in total.
- This effect lasts for 30s or until reaching the maximum number of Dreamweavers.
| Stat | Lv 1 | Lv 2 | Lv 3 | Lv 4 | Lv 5 | Lv 6 | Lv 7 | Lv 8 | Lv 9 | Lv 10 |
|---|---|---|---|---|---|---|---|---|---|---|
| Flowing Suffocation DMG | 189.13% | 204.64% | 220.15% | 241.86% | 257.37% | 275.20% | 300.01% | 324.83% | 349.64% | 376.00% |
| Diffusion DMG | 7.31%*21 | 7.91%*21 | 8.51%*21 | 9.35%*21 | 9.95%*21 | 10.64%*21 | 11.60%*21 | 12.56%*21 | 13.52%*21 | 14.54%*21 |
| Flowing Suffocation Cooldown | 25 | 25 | 25 | 25 | 25 | 25 | 25 | 25 | 25 | 25 |
| Resonance Cost | 125 | 125 | 125 | 125 | 125 | 125 | 125 | 125 | 125 | 125 |
| Flowing Suffocation Concerto Regen | 20 | 20 | 20 | 20 | 20 | 20 | 20 | 20 | 20 | 20 |
Ripple
- Attack the target, dealing Havoc DMG.
- Press Normal Attack shortly after casting this skill to start the Basic Attack combo from Basic Attack Stage 3.
Tidal Surge
- When in Mirage, Intro Skill becomes Tidal Surge, which triggers 3 coordinated attacks on hit, dealing Havoc DMG. Casting Tidal Surge resets the combo of Basic Attack Phantom Sting.
| Stat | Lv 1 | Lv 2 | Lv 3 | Lv 4 | Lv 5 | Lv 6 | Lv 7 | Lv 8 | Lv 9 | Lv 10 |
|---|---|---|---|---|---|---|---|---|---|---|
| Ripple DMG | 21.25%*4 | 23.00%*4 | 24.74%*4 | 27.18%*4 | 28.92%*4 | 30.93%*4 | 33.71%*4 | 36.50%*4 | 39.29%*4 | 42.25%*4 |
| Tidal Surge DMG | 8.50%*3+59.50% | 9.20%*3+64.38% | 9.90%*3+69.26% | 10.87%*3+76.09% | 11.57%*3+80.97% | 12.37%*3+86.58% | 13.49%*3+94.39% | 14.60%*3+102.20% | 15.72%*3+110.00% | 16.90%*3+118.30% |
| Ripple Concerto Regen | 10 | 10 | 10 | 10 | 10 | 10 | 10 | 10 | 10 | 10 |
| Tidal Surge Concerto Regen | 10 | 10 | 10 | 10 | 10 | 10 | 10 | 10 | 10 | 10 |
- Amplify the incoming Resonator's Havoc DMG by 20% and Resonance Skill DMG by 25% for 14s. Switching Resonators ends this effect.
Skill Upgrade Materials
| Lv 2 | Lv 3 | Lv 4 | Lv 5 | Lv 6 | Lv 7 | Lv 8 | Lv 9 | Lv 10 |
|---|---|---|---|---|---|---|---|---|


Resonance Chain
- Casting Resonance Skill recovers 1 points of Trance. The DMG Multiplier of Resonance Skill Graceful Step, Resonance Skill Flickering Reverie, and Forte Circuit Perception Drain is increased by 50%.
- Immune to interruptions while casting Perception Drain.
- Resonance Liberation Flowing Suffocation now sends the target into Hazy Dream. The DMG Multiplier of Jolt triggered by Cantarella is increased by 245%.
- The DMG Multiplier of Resonance Liberation Flowing Suffocation is increased by 370%. After casting Resonance Liberation Flowing Suffocation, enter into Mirage. If already in Mirage, casting Resonance Liberation Flowing Suffocation does not activate the Mirage state again.
- When in Mirage, Healing Bonus is increased by 25%.
- The maximum number of Dreamweavers Cantarella can summon through Resonance Liberation Diffusion is increased by 5.
- Increase the DMG Multiplier of Basic Attack Phantom Sting by 80%. Casting Resonance Liberation Flowing Suffocation makes Cantarella's DMG ignore 30% of the target's DEF for 10s.
- For the first 1.2s of Hazy Dream, when the target takes an instance of DMG that does not inflict Hazy Dream, Jolt will not be triggered on the target.
Skill Priority
Weapons

Cantarella's signature weapon is expectedly perfect for her, as it gives her a huge boost to many stats including CRIT DMG, ATK, Basic ATK DMG Bonus and can even ignore Havoc RES. These buffs activate naturally quickly in her rotation, making the weapon especially powerful.

Cantarella can make great use of the passive effects of Zhezhi's signature weapon since she heavily benefits from Basic Attack DMG Bonus. It also has CRIT DMG and ATK% - 2 stats Cantarella enjoys as a damage dealer. Having 3 uses of her Resonance Skill, Cantarella is able to exploit this weapon's passive effects well too. This makes this option an outstanding choice for her if you own it.
Yinlin's signature weapon is a versatile option that gives a lot great stats such as CRIT Rate, All-Type DMG Bonus and ATK, especially if the character deals off-field damage or uses Swap Cancels. Because of this, it almost always lands as the #1 or #2 weapon of choice for rectifier damage dealers. However, on Cantarella specifically, this weapon gives stats that can be diluted by some of her best teammates buffs, making Rime-Draped Sprouts equal or slightly better than it with other Supports buffing Cantarella.

Phoebe's signature works as a pure stat stick for Cantarella — the buffs that it provides are linked to Spectro Frazzle so beyond an extra 12% ATK and 36% CRIT Rate this weapon's effects are completely unexploitable, however it gets enough stats to stand out as an option if you own it.
The standard banner weapon does many good things for Cantarella. It offers a minor amount of Energy Regen that she very much appreciates, it gives a lot of ATK% for the extra damage and it has a stackable Basic ATK DMG Bonus effect that Cantarella heavily benefits from. Overall an amazing F2P-friendly option if you choose to acquire it.

Outstanding generic Rectifier option, offering base CRIT RATE for excellent scaling but also an easily activatable and maintainable bonus ability granting ATK% after the wearer's Resonance Liberation is activated. Almost any character who can use CRIT RATE and ATK will be more than happy to have this weapon available only losing to 5★ options.

Despite this weapon being in direct competition with other F2P 4* options, this weapon is very solid for any ATK% scaling characters. The ATK% boost it provides when casting your Resonance Skill is great on most characters. On Cantarella specifically, the extra Energy you get from its passive after casting your Resonance Skill is especially appreciated as Cantarella needs a lot of Energy funneled into her, making this fully F2P option perform way better than usual.

A good alternative 4★ Rectifier to Augment, offering an easy to maintain bonus ability granting ATK% after using an Intro skill and a good amount of ATK% as a main stat.
Echo set
Echo set 1
5pcs Set: When Outro Skill is triggered, deal additional 480% Havoc DMG to surrounding enemies, considered Outro Skill DMG, and grant the incoming Resonator 15% Havoc DMG Bonus for 15s.
Midnight Veil is the best-in-slot 5-pc echo set for Cantarella as it deals decent Havoc DMG while boosting the next Resonator's Havoc DMG Bonus.

Transform into Lorelei and attack surrounding enemies, dealing 405.00% Havoc DMG.
The Resonator with this Echo equipped in their main slot gains 12.00% Havoc DMG Bonus and 12.00% Basic Attack DMG Bonus.
CD: 25s.
This echo provides Cantarella with extra Havoc DMG Bonus and Basic Attack DMG Bonus, which she both scales off.
Echo set 2
5pcs Set: Upon using Outro Skill, increases the ATK of the next Resonator by 22.5% for 15s.
This set improves upon Cantarella as a Sub-DPS as it increases the next Resonator's ATK and damage dealt with Impermanence Heron.

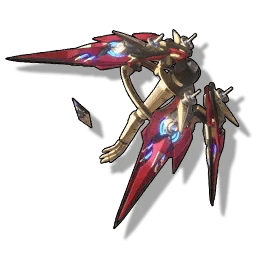
Transform into Impermanence Heron to fly up and smack down, dealing 310.56% Havoc DMG.
Long press to stay as Impermanence Heron and continuously spit flames, each attack dealing 55.73% Havoc DMG.
Once the initial attack lands on any enemy, the current character regains 10 Resonance Energy. If the current character uses their Outro Skill within the next 15s, the next character's damage dealt will be boosted by 12% for 15s.
CD: 20s
Maximizes her outro skill buffs for the next resonator on the field.
Echo set 3
5pcs Set: Increase the Resonator's Coordinated Attack DMG by 80%. Upon a critical hit of Coordinated Attack, increase the active Resonator's ATK by 20% for 4s.
Empyrean Anthem is also a good option for Cantarella as it maximizes her Coordinated Attacks to deal as much damage as possible while also increasing the active Resonator's ATK.

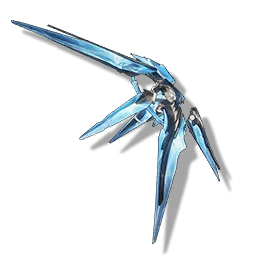
Summon 3 twirling Crescent Servants around you. Crescent Servants attack enemies with their spinning blades, dealing 45.59% Havoc DMG. Triggering a Counterattack with the Echo attacks resets the Crescent Servants' duration.
The Resonator with this Echo equipped in the main slot has their Coordinated Attack DMG increased by 40.00%.
CD: 20s.
Hecate as the main echo provides further Coordinated Attack DMG Bonus, making it a decent option for Cantarella.
Echo stat
Synergies & Team Formation
Synergies

Phlorova and Cantarella make a perfect duo, as Phlorova can fully benefit from Cantarella's buffs. This synergy allows players to build the strongest Havoc team capable of tackling all content in the game.

While not Camellya's strongest pairing, thanks to Cantarella's 20% Havoc DMG Amplify on her Outro, her additional healing and good off-field damage, the two work naturally together. Cantarella with Camellya falls behind both Sanhua and Roccia in damage but boasts more comfortable sustain thanks to the extra heals, making it a viable option.

Similarly to Camellya, Havoc Rover will tend to prefer Danjin or Sanhua when focusing on damage (Camellya and Havoc Rover primarily doing Basic Attack DMG). With that being said, a chunk of Havoc Rover’s damage is also concentrated within both their Skill and Ultimate, so they appreciate the Skill amplification and the general Havoc amplification for their Ultimate as well. The extra healing Cantarella provides is also comfortable in any case. This makes the pairing very strong.

Cantarella is the first character to properly enable Danjin to function as a potent Main DPS. She replaces the imperfect alternative of Mortefi, by allowing Danjin to exploit her multiple damage types thanks to her Skill and Havoc DMG Amplify Outro. The two together make for the best 4-star Main DPS team in the game (especially with S6 on Danjin), approaching the strength of some 5-stars (while still performing slightly lower). However, be wary that Danjin's HP loss mechanic is especially accentuated when playing her as a Main DPS, so this team will take a lot of effort to learn.


Cantarella and Carlotta pair effectively thanks to Cantarella's ability to amplify Carlotta's overwhelming Skill DMG with her Outro. However, due to Cantarella's low energy generation, Carlotta will need to build more Energy Regen than usual for her Ultimate to accomodate for this. Outside of this restriction the combo is a good alternative to Zhezhi.


Like Carlotta, Cantarella can work well with Jinhsi thanks not only to her Skill DMG Amplification, but also her ability to execute Coordinated Attacks. Unfortunately, Energy Regen is once again an issue forcing Cantarella to need to run an Energy Regen main stat Echo in a lot of cases or unless she's built on Moonlit Clouds. On top of this, Jinhsi will also suffer not able to use her Ultimate more than once every 3 rotations. These factors hinder the pair compared to Zhezhi or even Yinlin, however it's still viable.

One of the usual Healing Support options that can slot into any team. Super easy to use, provides amazing team-wide ATK% buffs and 15% DMG Amplify with one of the fastest rotations in the game

Similar to Verina, a premium Healing Support option who can not only slot into any team, but also provide insane 12.5% Crit Rate, 25% Crit DMG, 25% ATK and 15% DMG Amplify buffs to your whole team. One of the best but also easy to use characters in the game.
Team Formation
Best Team

Double Havoc
Use Cantarella on Midnight Veil here. It's recommended to use Verina with Danjin because she takes a ton of field time as a Main DPS.
Carlotta Team
Carlotta is a DPS unit that also benefits from having her Resonance Skill buffed and from Coordinated Attacks, which Cantarella both provides.
Jinhsi Team
Strongly recommended to use Cantarella on Moonlit Clouds to alleviate Energy requirements. Verina is a better pick than Shorekeeper due to requiring less field time and providing extra Coordinated Attacks.
More Info
Cherished Items
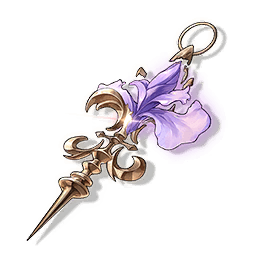
 Coral Parasol
 The parasol carried by Cantarella.
Its round canopy resembles a soft, plump jellyfish with long, graceful tentacles that seem to float effortlessly in the air. The ribs of the parasol are crafted from deep-sea coral, meticulously shaped into perfect curves that gleam with a subtle glow, both beautifully delicate and unyieldingly strong. At the handle, a sapphire is embedded, a symbol of the unshakable authority of the family head.
Violence has never been Cantarella's first choice, but when forced to defend herself, she merely spins her parasol, and in an instant, the canopy radiates brilliant light. From it, a mesmerizing swarm of jellyfish unfurls, drifting into a phantasmal sea of illusion.
Drawing her enemies into this enchanting yet perilous sea of dreams is the signature art of Cantarella. Like its owner, the parasol may appear soft and fluid, yet when the need arises, it is always indestructible.
 Cauldron of Sweet Dreams
 The cauldron used by Cantarella, the Sea Witch, for potion brewing. The sapphire adorned on it marks Cantarella's authority as the head of the Fisalias.
She often allows her whims to guide her, carelessly tossing in unexpected ingredients, such as jellyfish tentacles, fish scales, tears from the heartbroken, and even the murmurs that linger in the air.
Whatever she adds, the result is always a pot of sweet dreams that dissolves the bitterness of reality, gently soothing those lost in the abyss.
 Potion Vial
 Cantarella always carries this potion vial, adorned with a sapphire as bright as the one she wears as a mark of her authority. Inside, she keeps a special brew, one she carefully prepares to ease weariness and calm nightmares.
However, ever since you brought her away from the Sea of Ghosts, the nightmares have ceased.
Now, this vial is imbued with her rare sincerity and tenderness, like a soft light piercing the abyss, reflecting the gentle murmurs hidden in the rolling waves. It is now a symbol of the trust Cantarella has placed in you, the one who has navigated the dark tides and reached the depths for her.
All Comments 0